Promotion Builder
Overview
The Promotion Builder is a step-based workflow that enables teams to create and deploy compliant promotional campaigns across an organization’s products and customer bases. Users can define their target audience, set rules and parameters, and determine when desired outcomes are executed for a promotional campaign — all within an intuitive interface.
Configuring Campaign Settings
Campaign Settings allow a user to create controls and arrange the broader parameters of a promotion– before defining the promotion logic. These settings are vital to determining the structure of a campaign. There are a number of settings that can be configured, as detailed below:
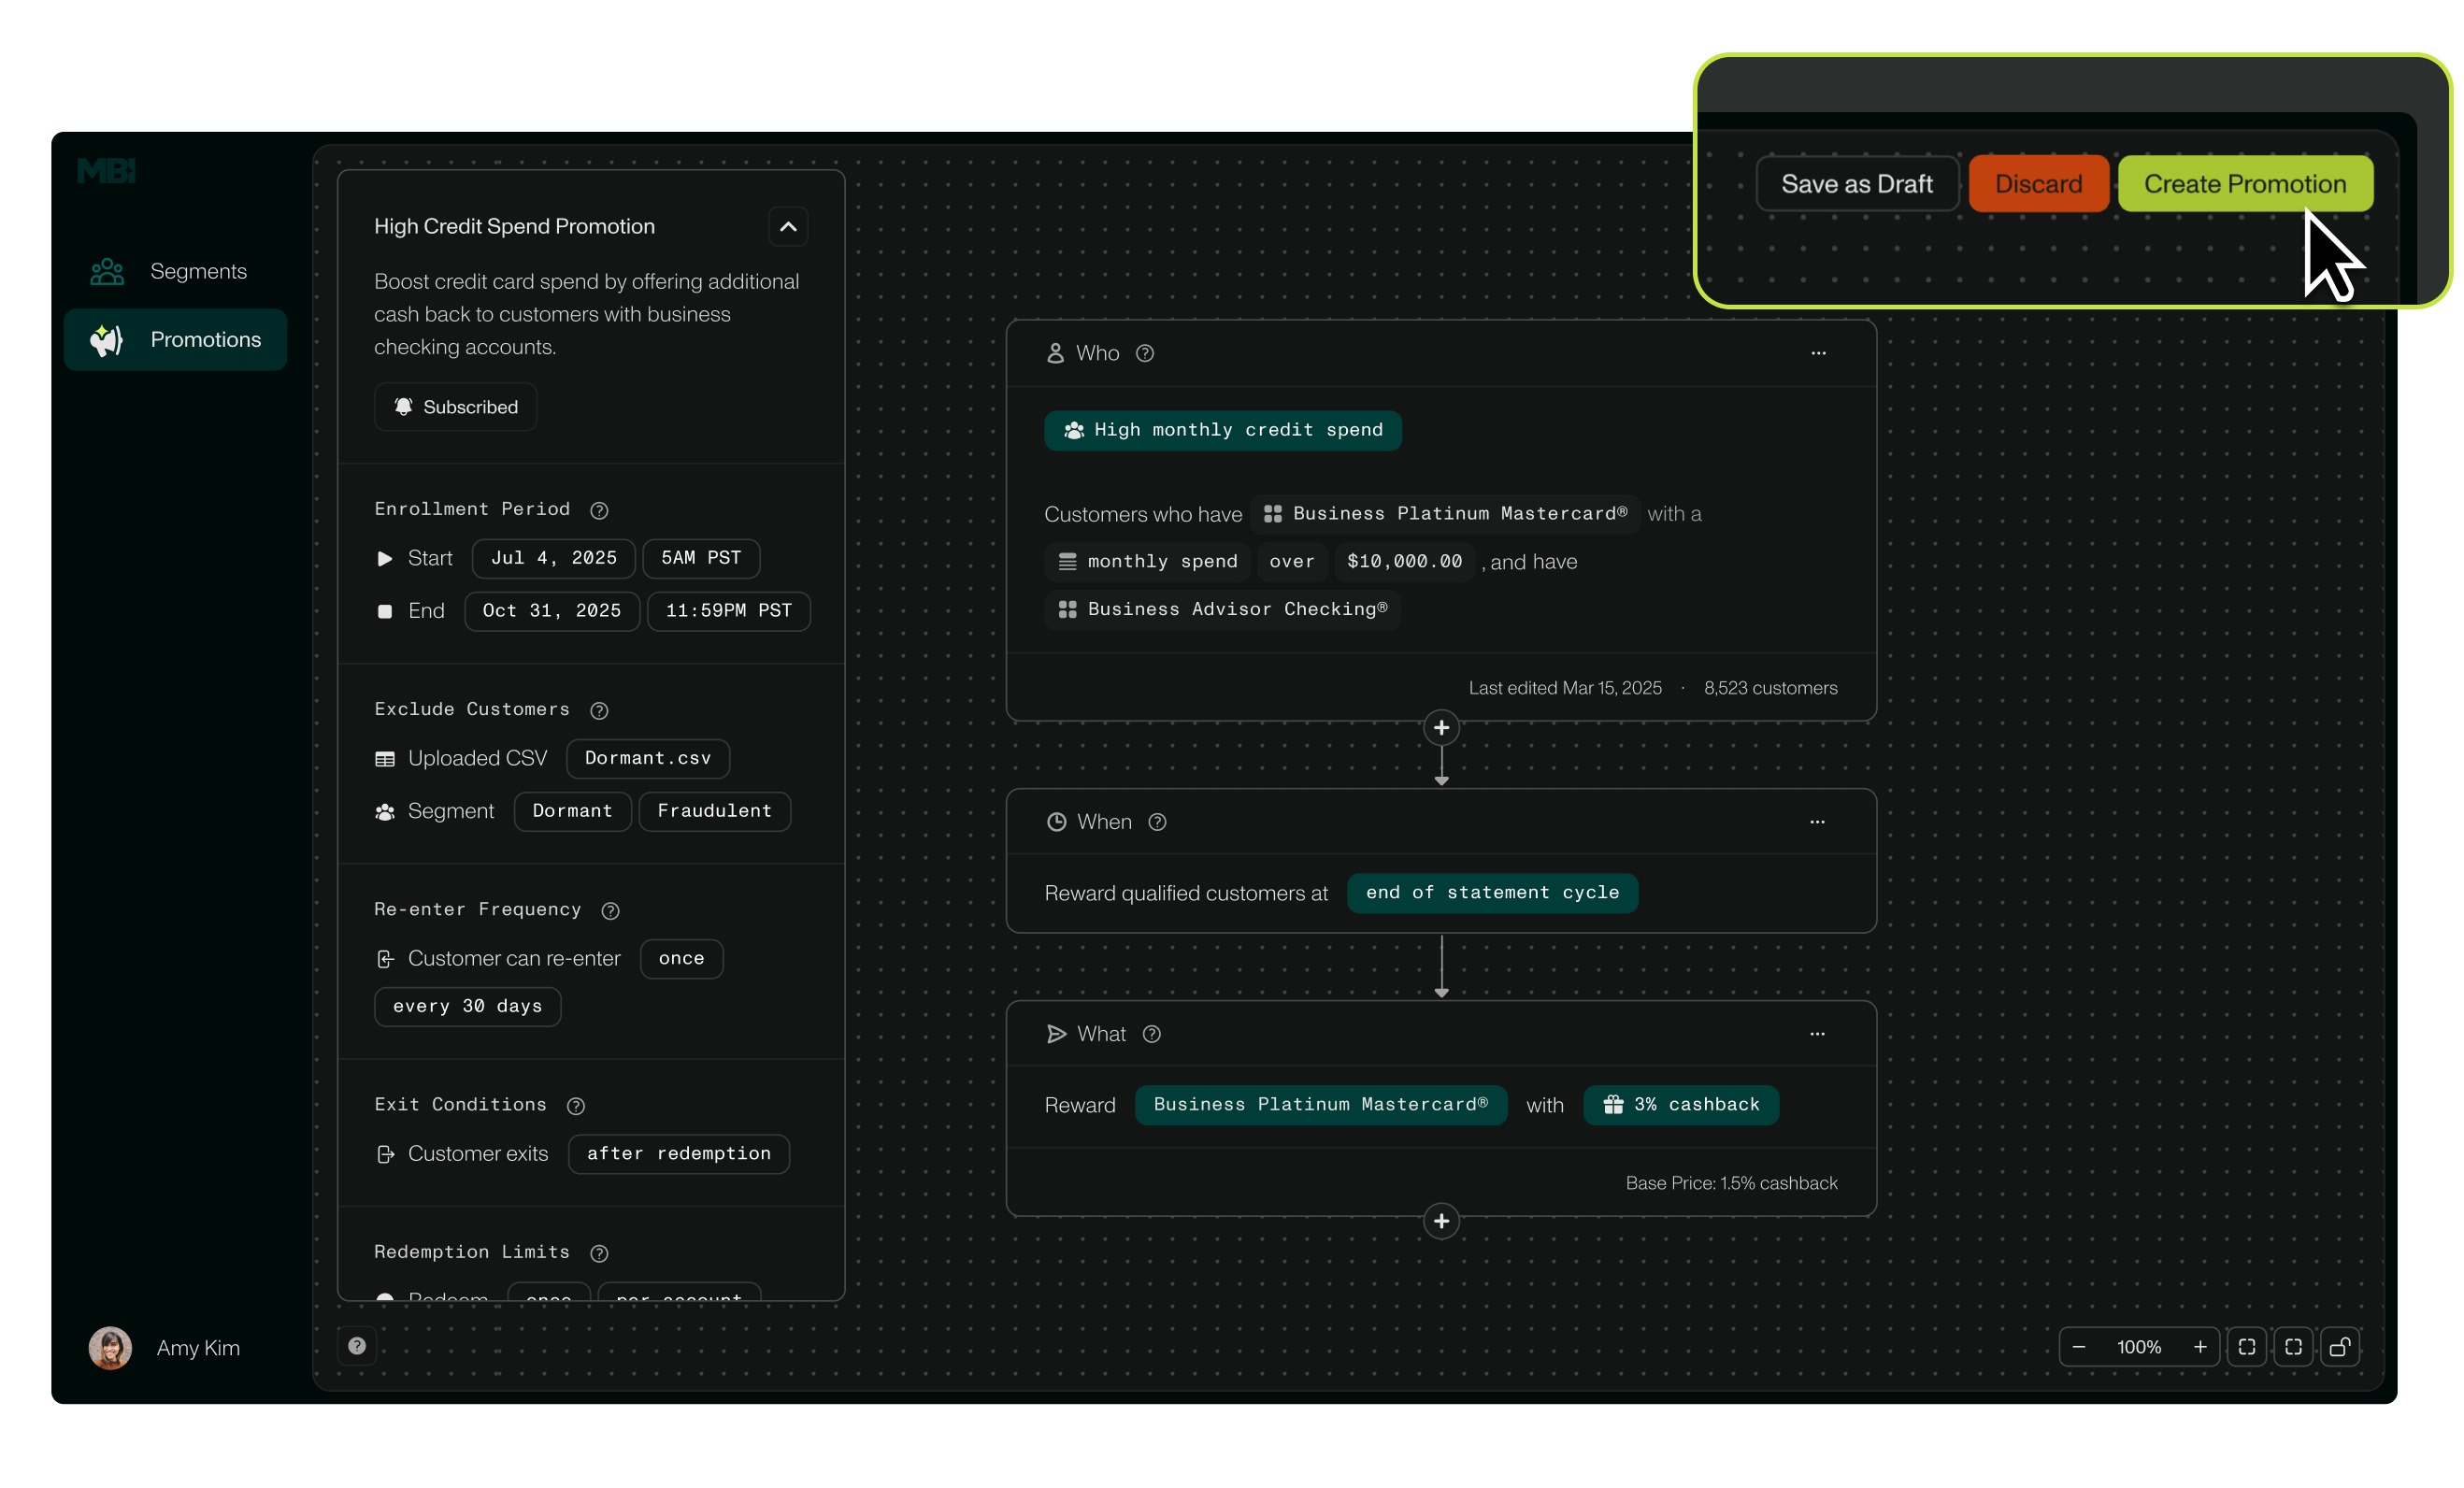
- Promotion Timeframe: Encompasses the start and end date(s) of when the campaign is active.
- Exclude Customers: Customer exclusions allows the user to omit customer(s)/customer groups from a campaign based on Tags (e.g., if a customer is considered High Risk).
- Re-enrollment Parameters: Determines how often, if ever, a customer can re-enroll in a campaign.
- Exit Conditions: Defines how a customer leaves the campaign (e.g., after redemption, after a specific timeframe, or upon disqualification).
- Reward Limits: Determines the frequency in which a customer’s account can redeem a campaign outcome (e.g., once per account, or more).
Creating a Campaign
To build a Promotion, follow these steps:
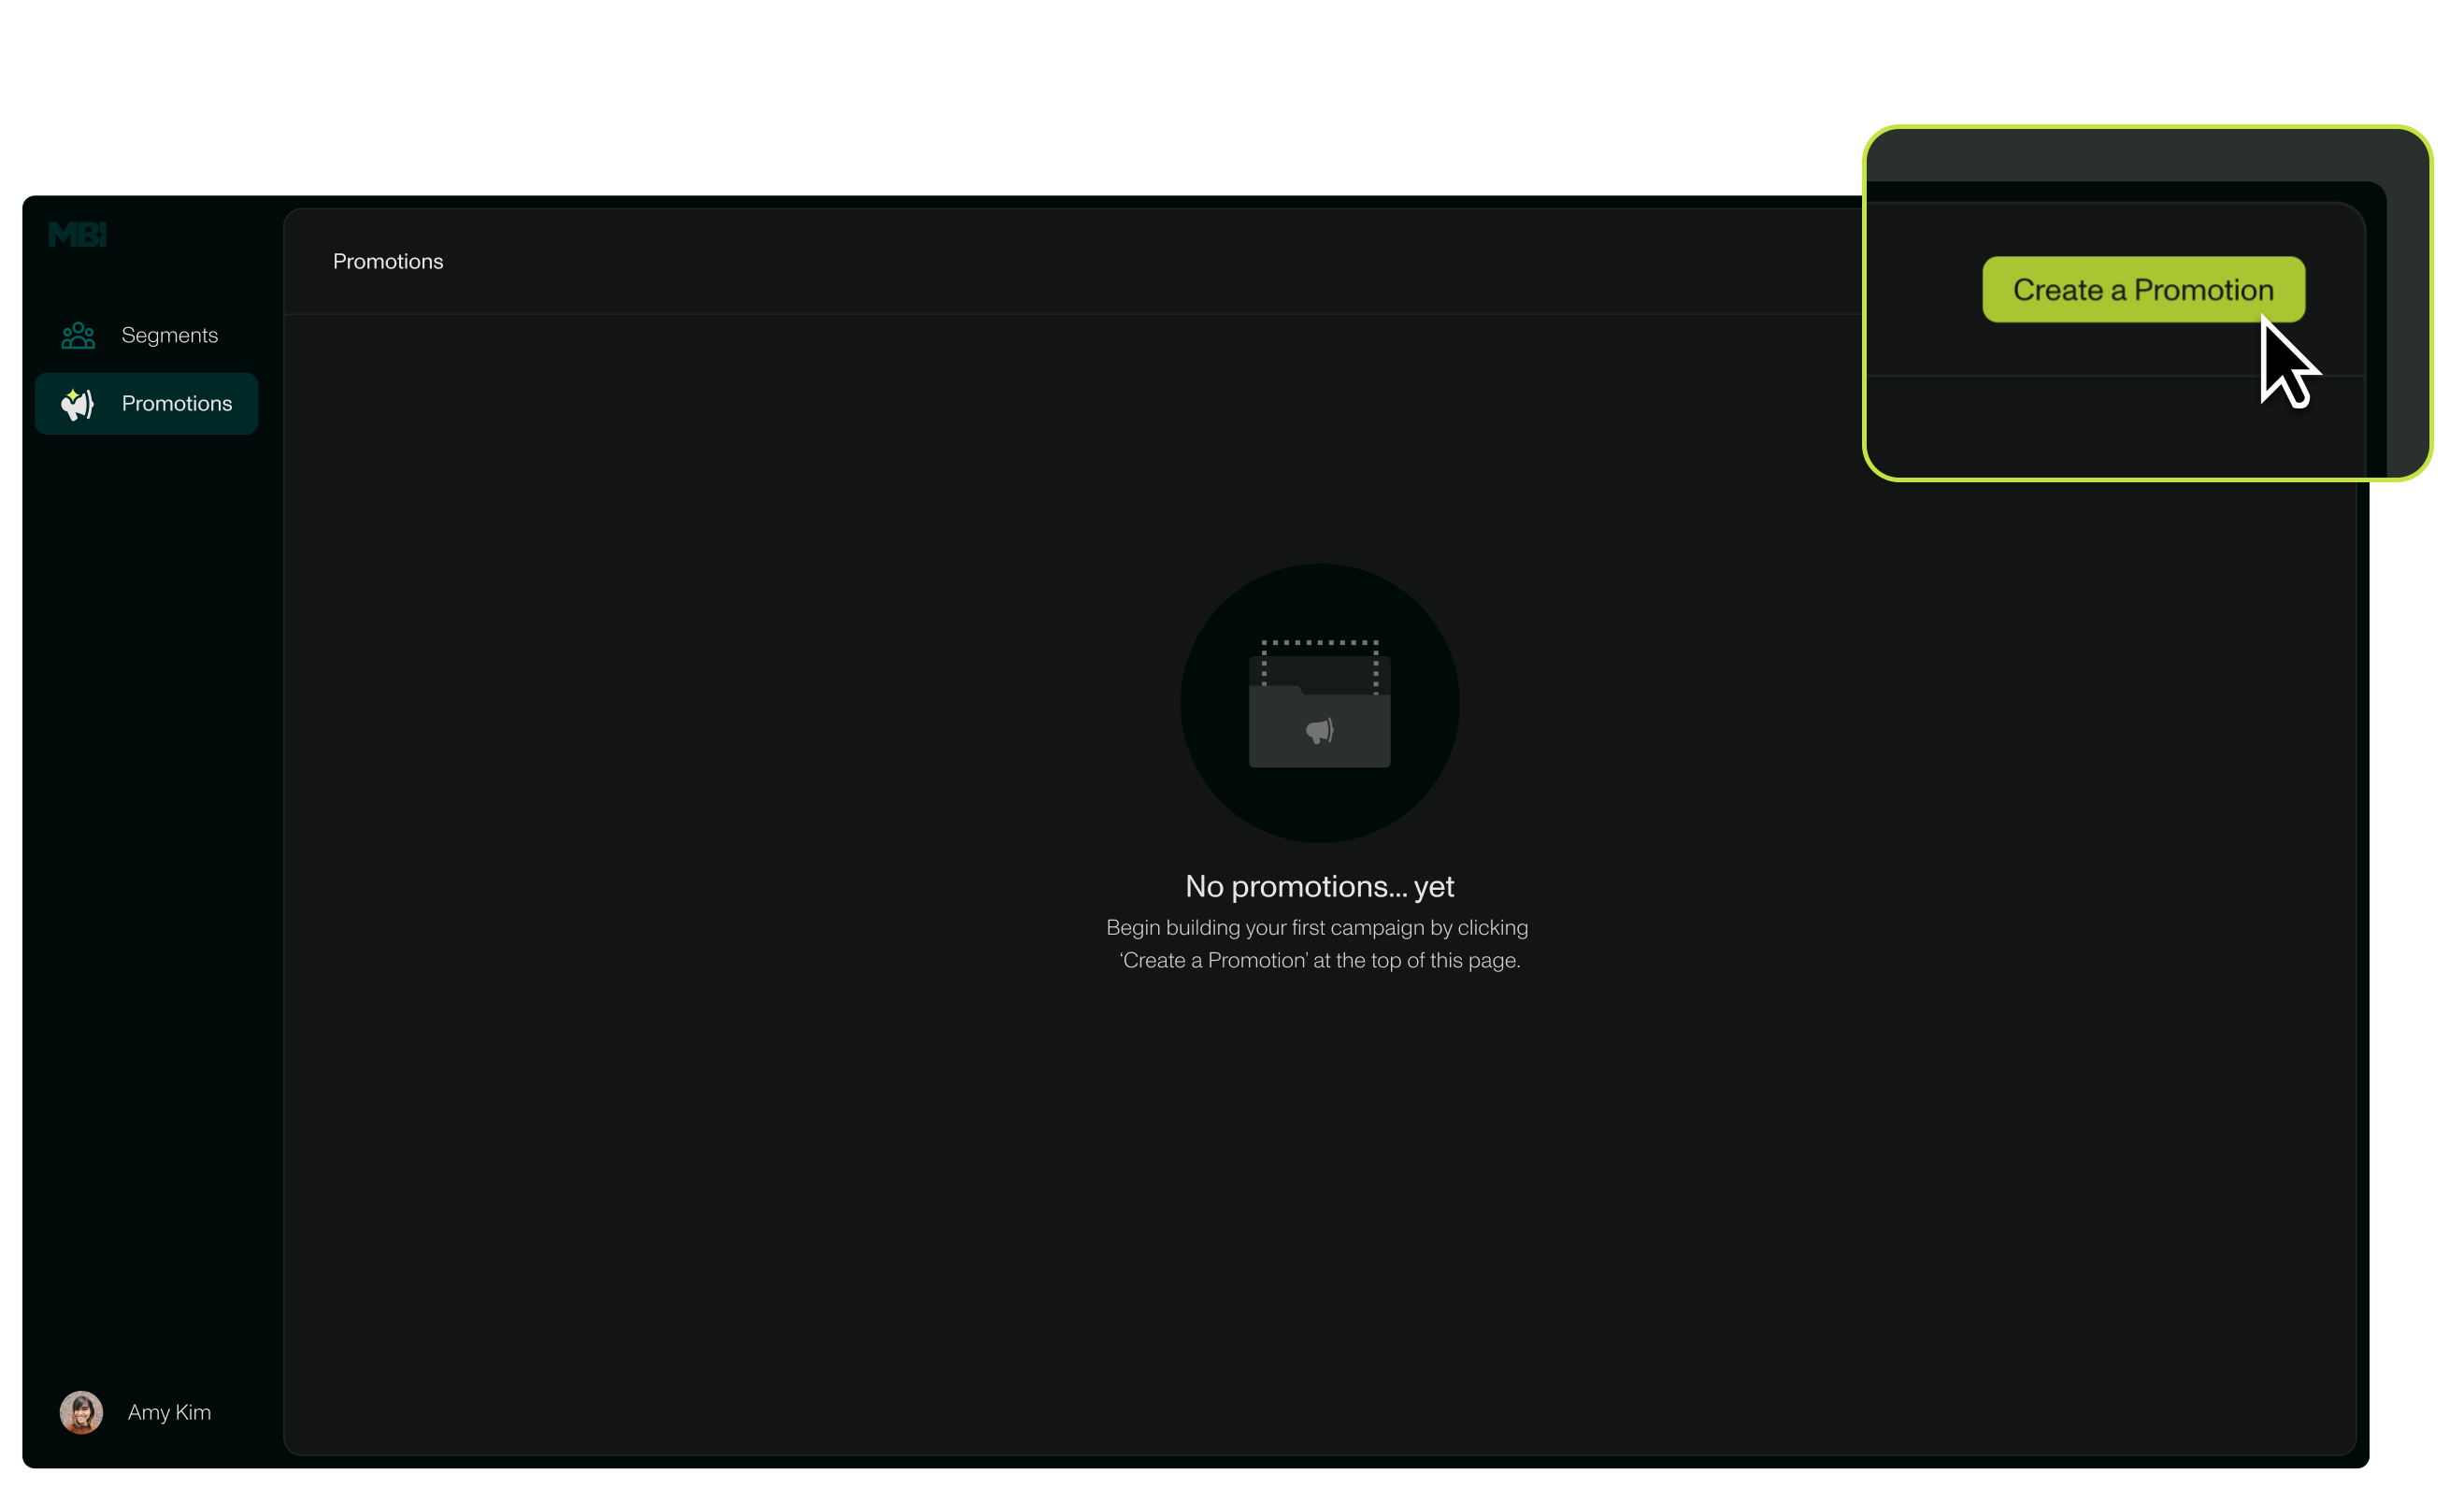
- Select the Promotions page on the lefthand navigation menu. Click on the green Create Promotion on the top right corner of the screen.
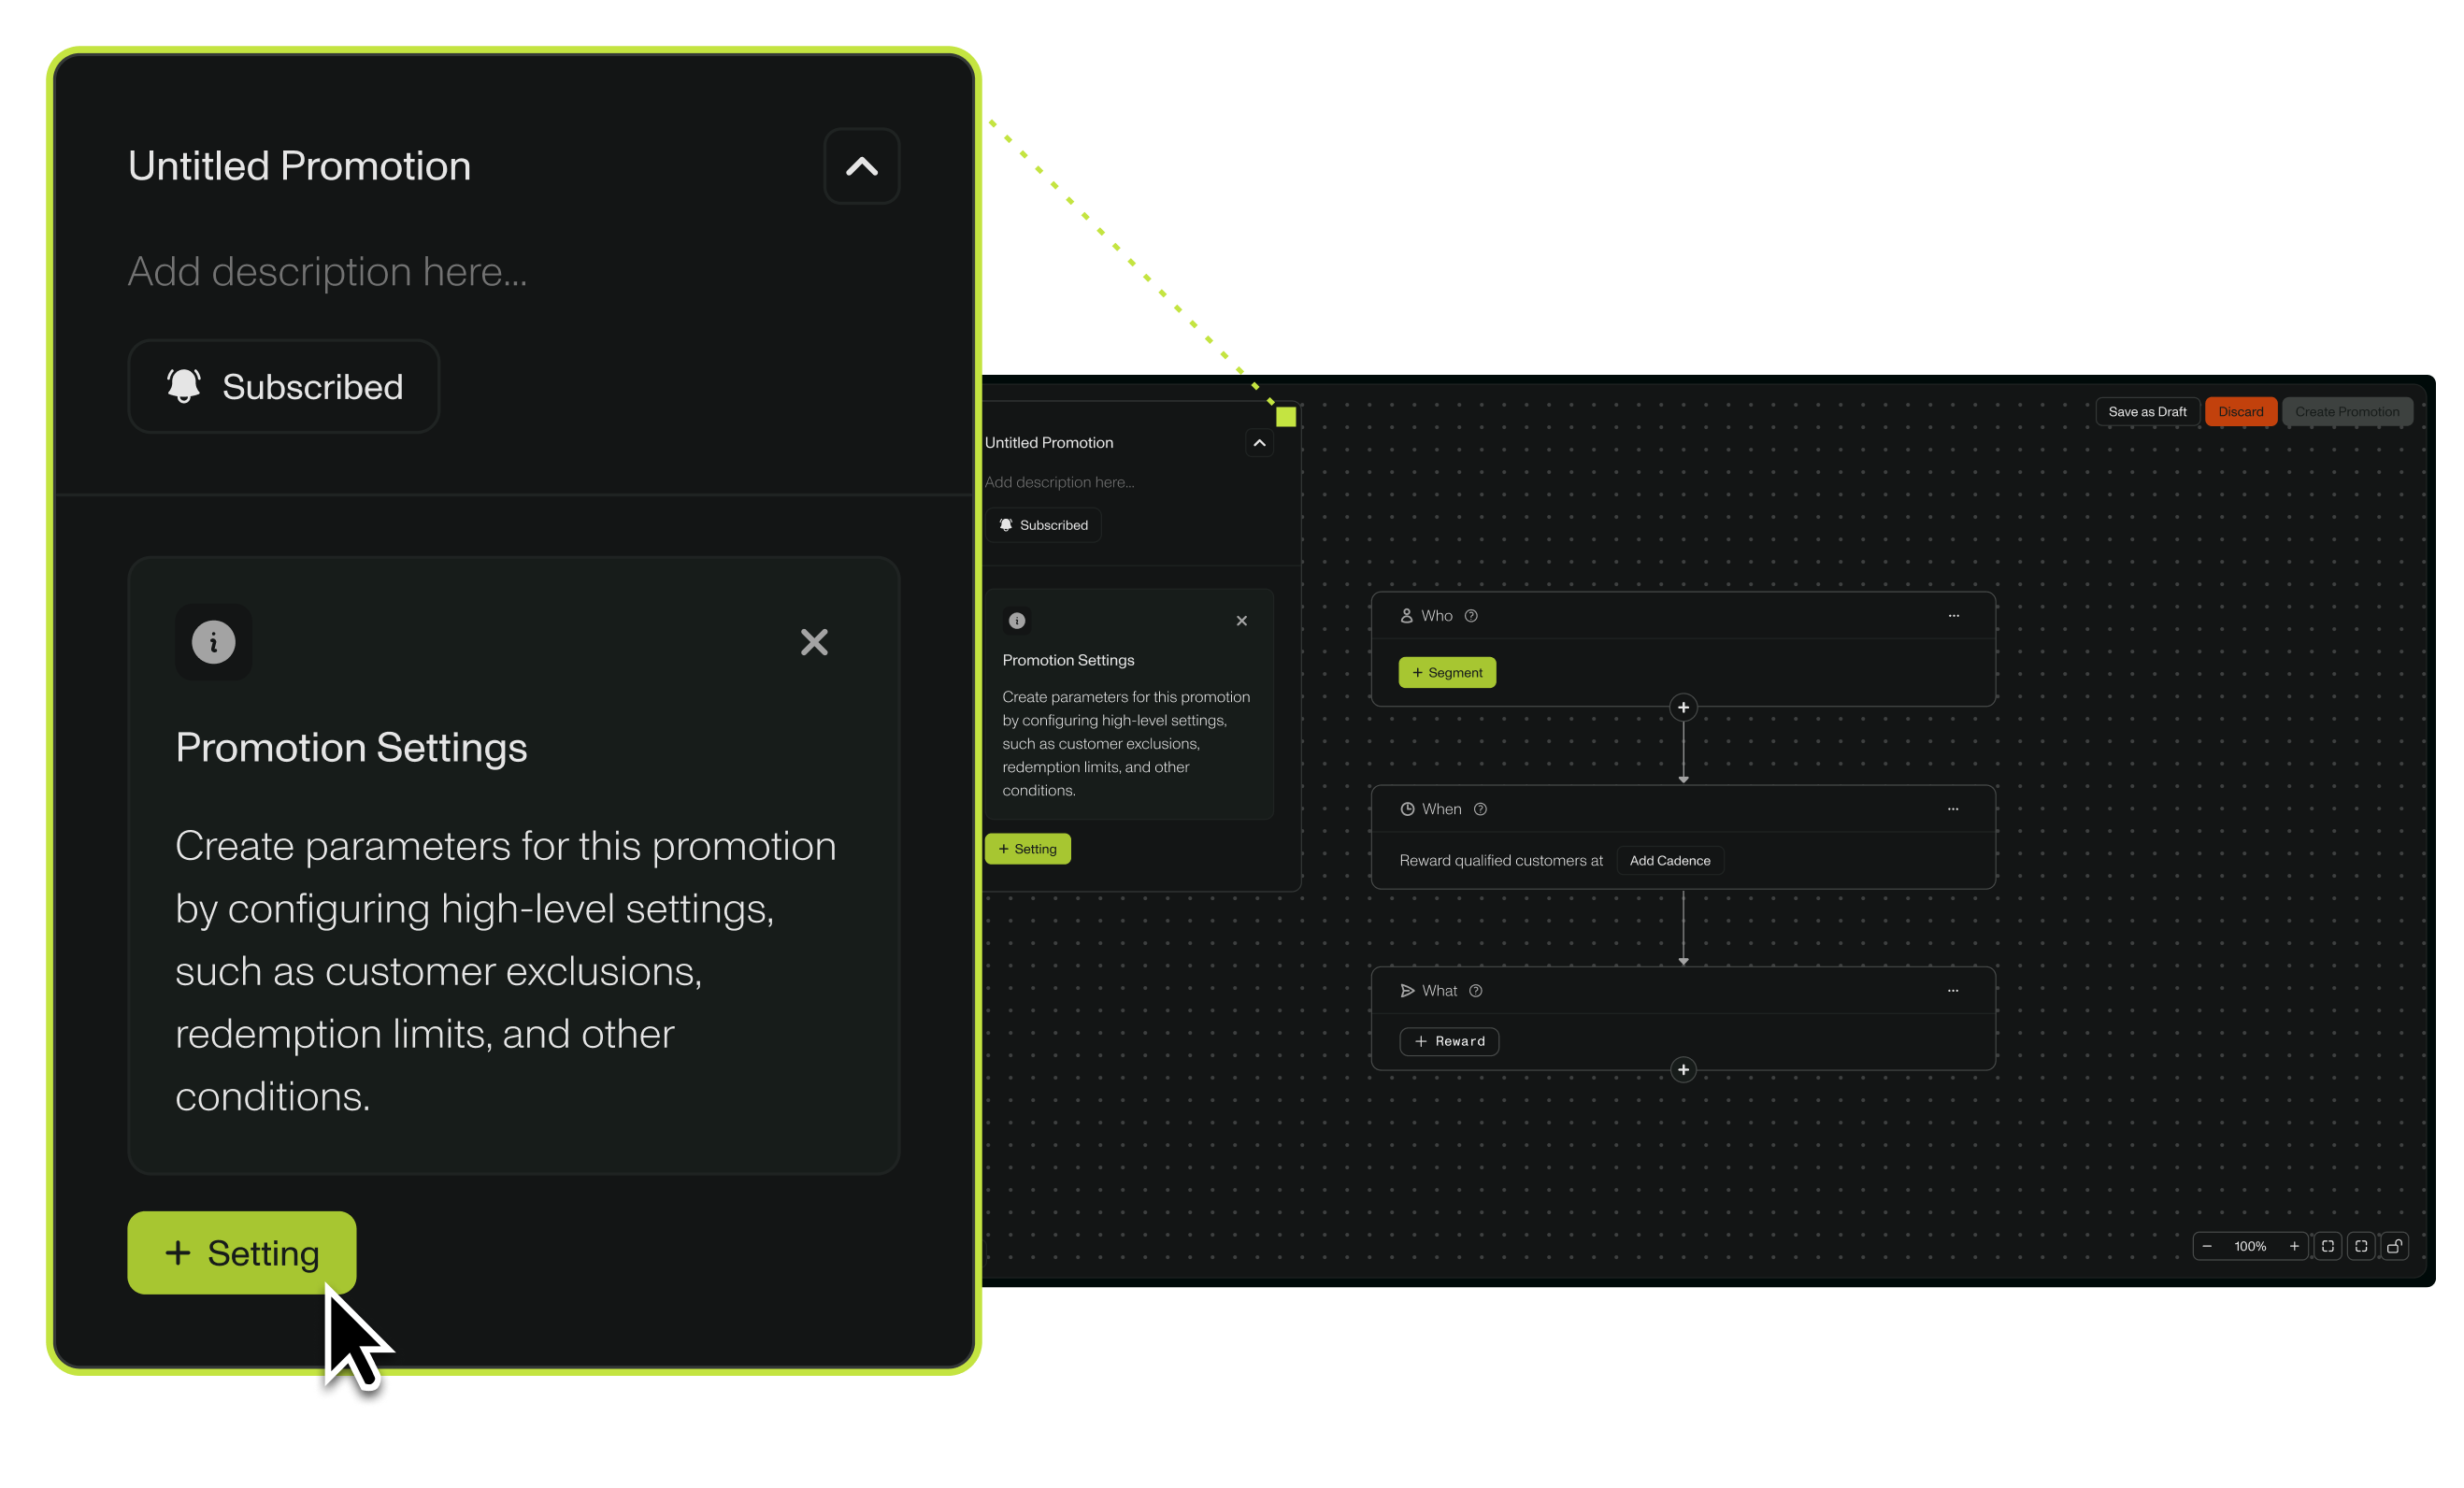
- Using the floating box on the lefthand side, configure Campaign Settings by naming the promotion and adding a short description. You can edit Campaign Settings now by clicking on the green + Settings button, or return to this step later.
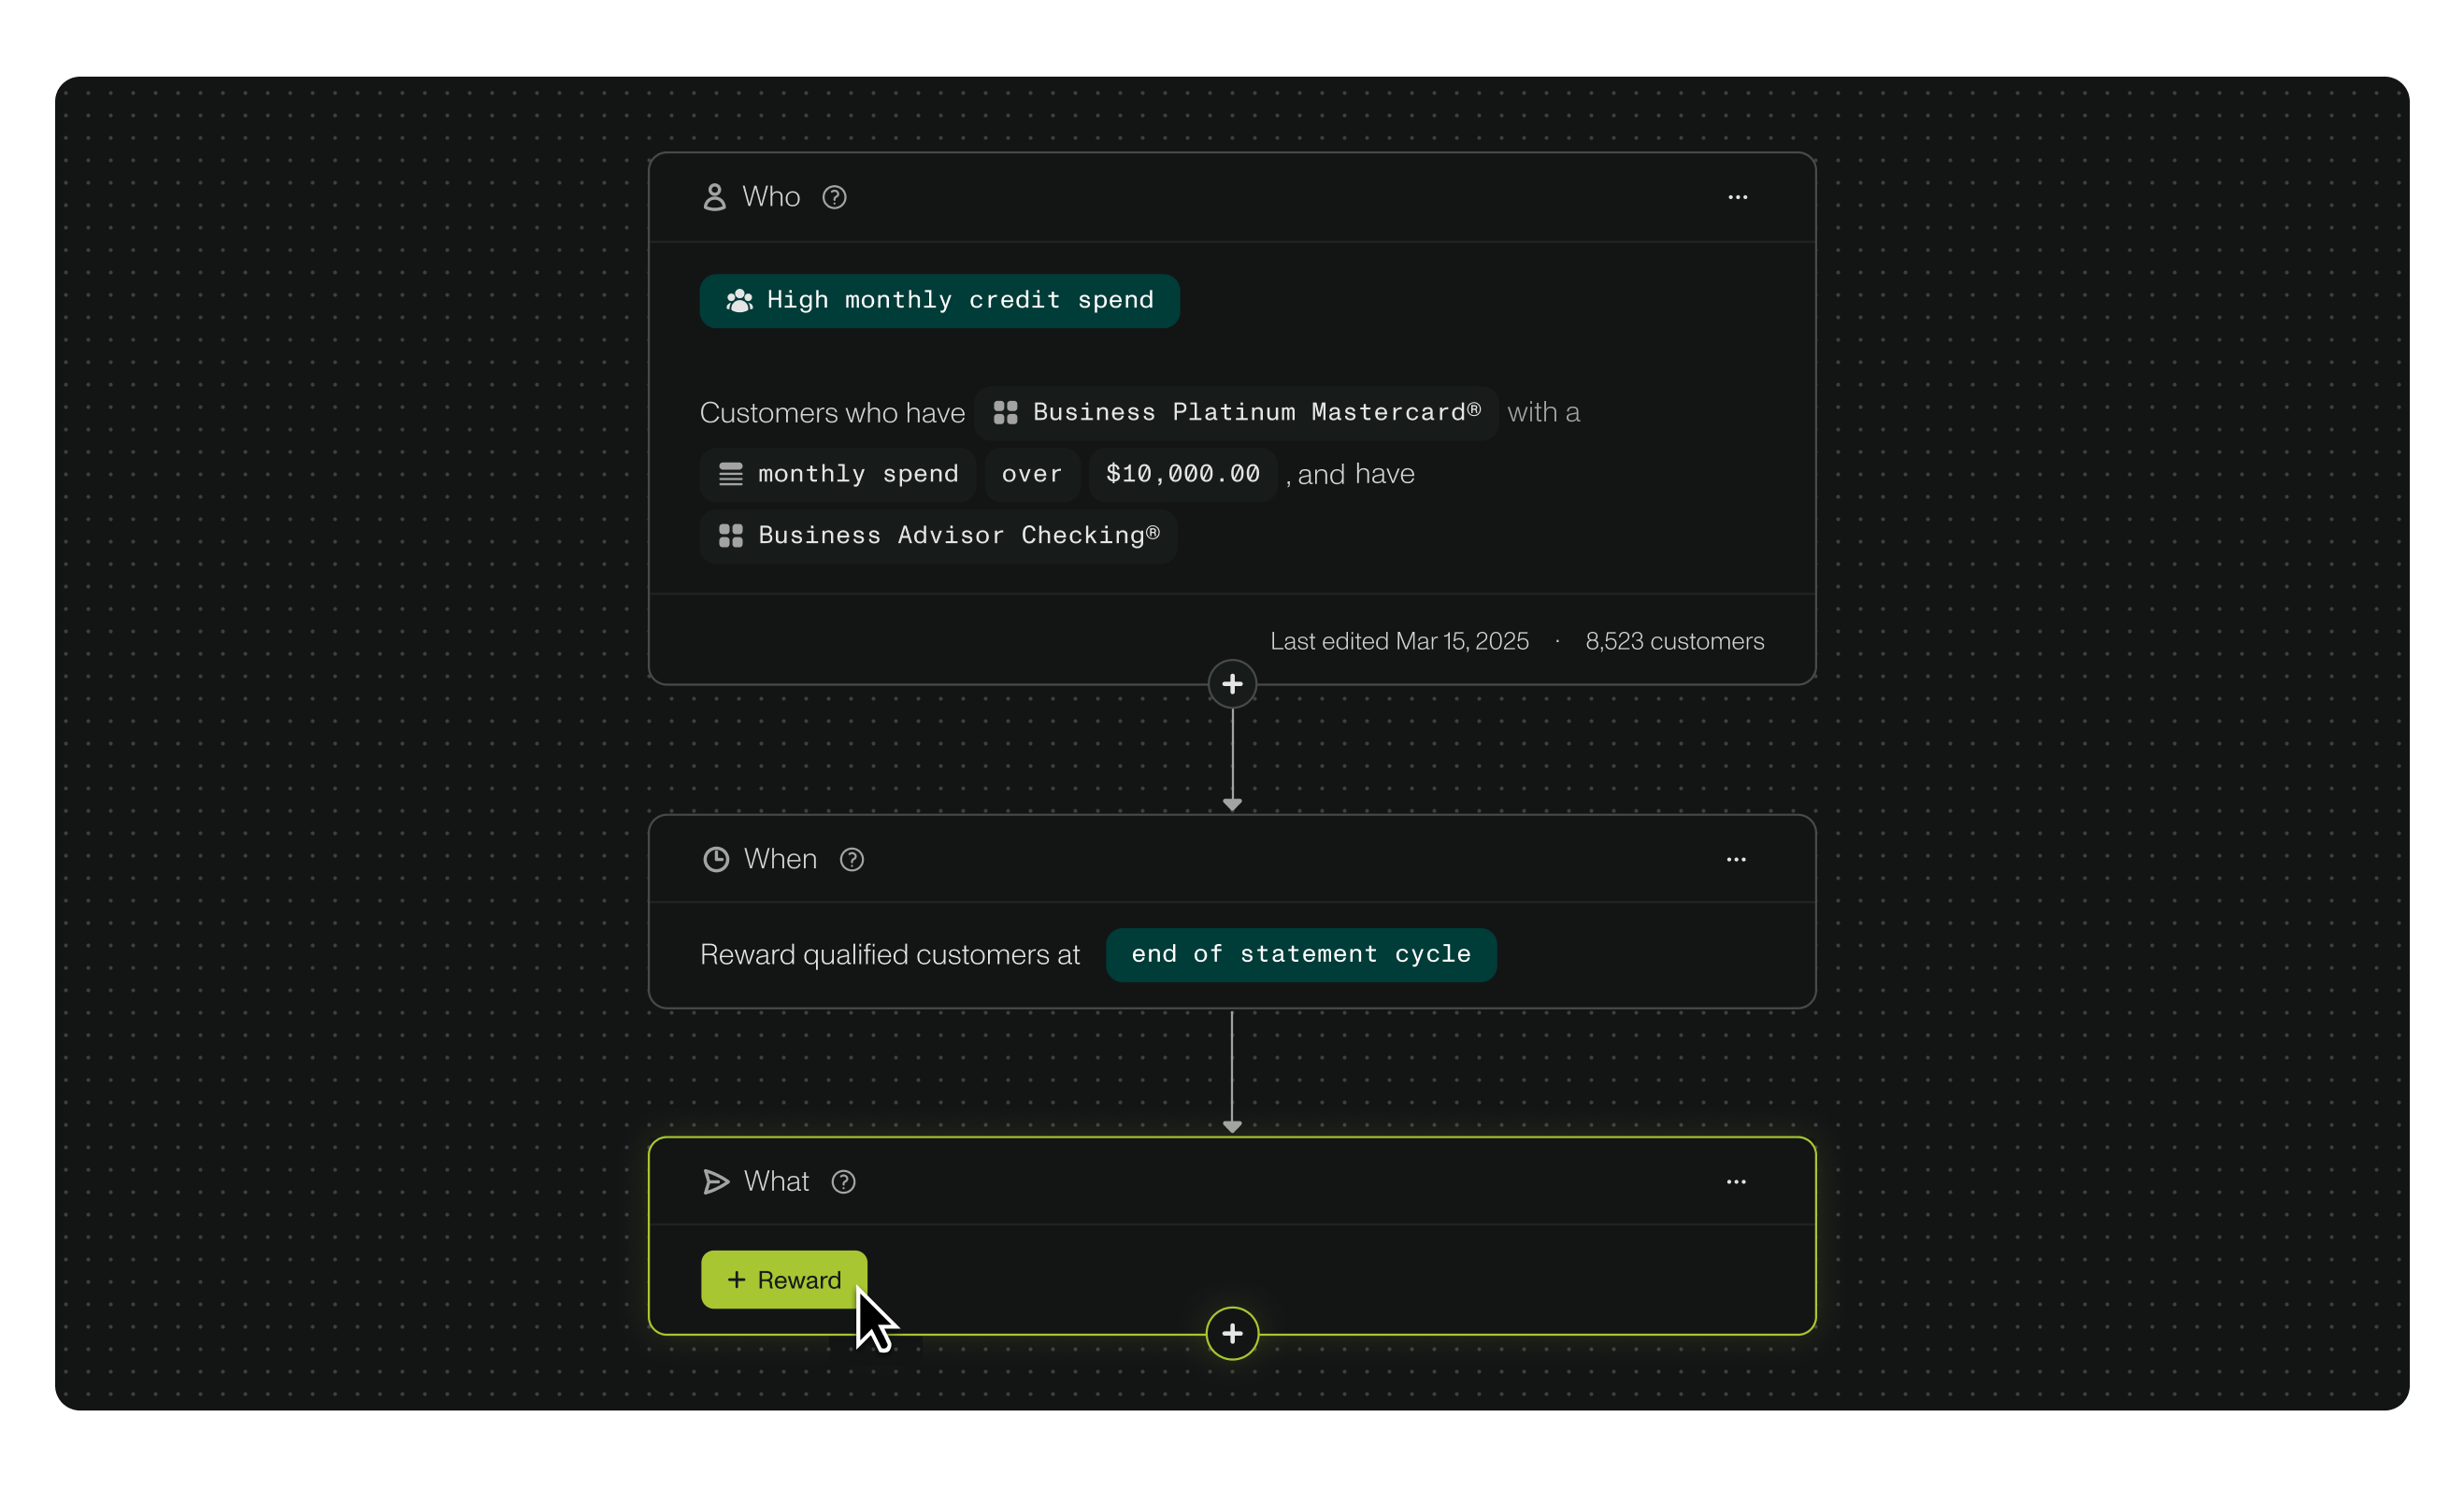
- Add a Segment. Navigate to the first step in the workflow builder in the center of the page, titled Who. Here, you can add multiple Segments that will be included in the promotion, by clicking on the green + Segments button.
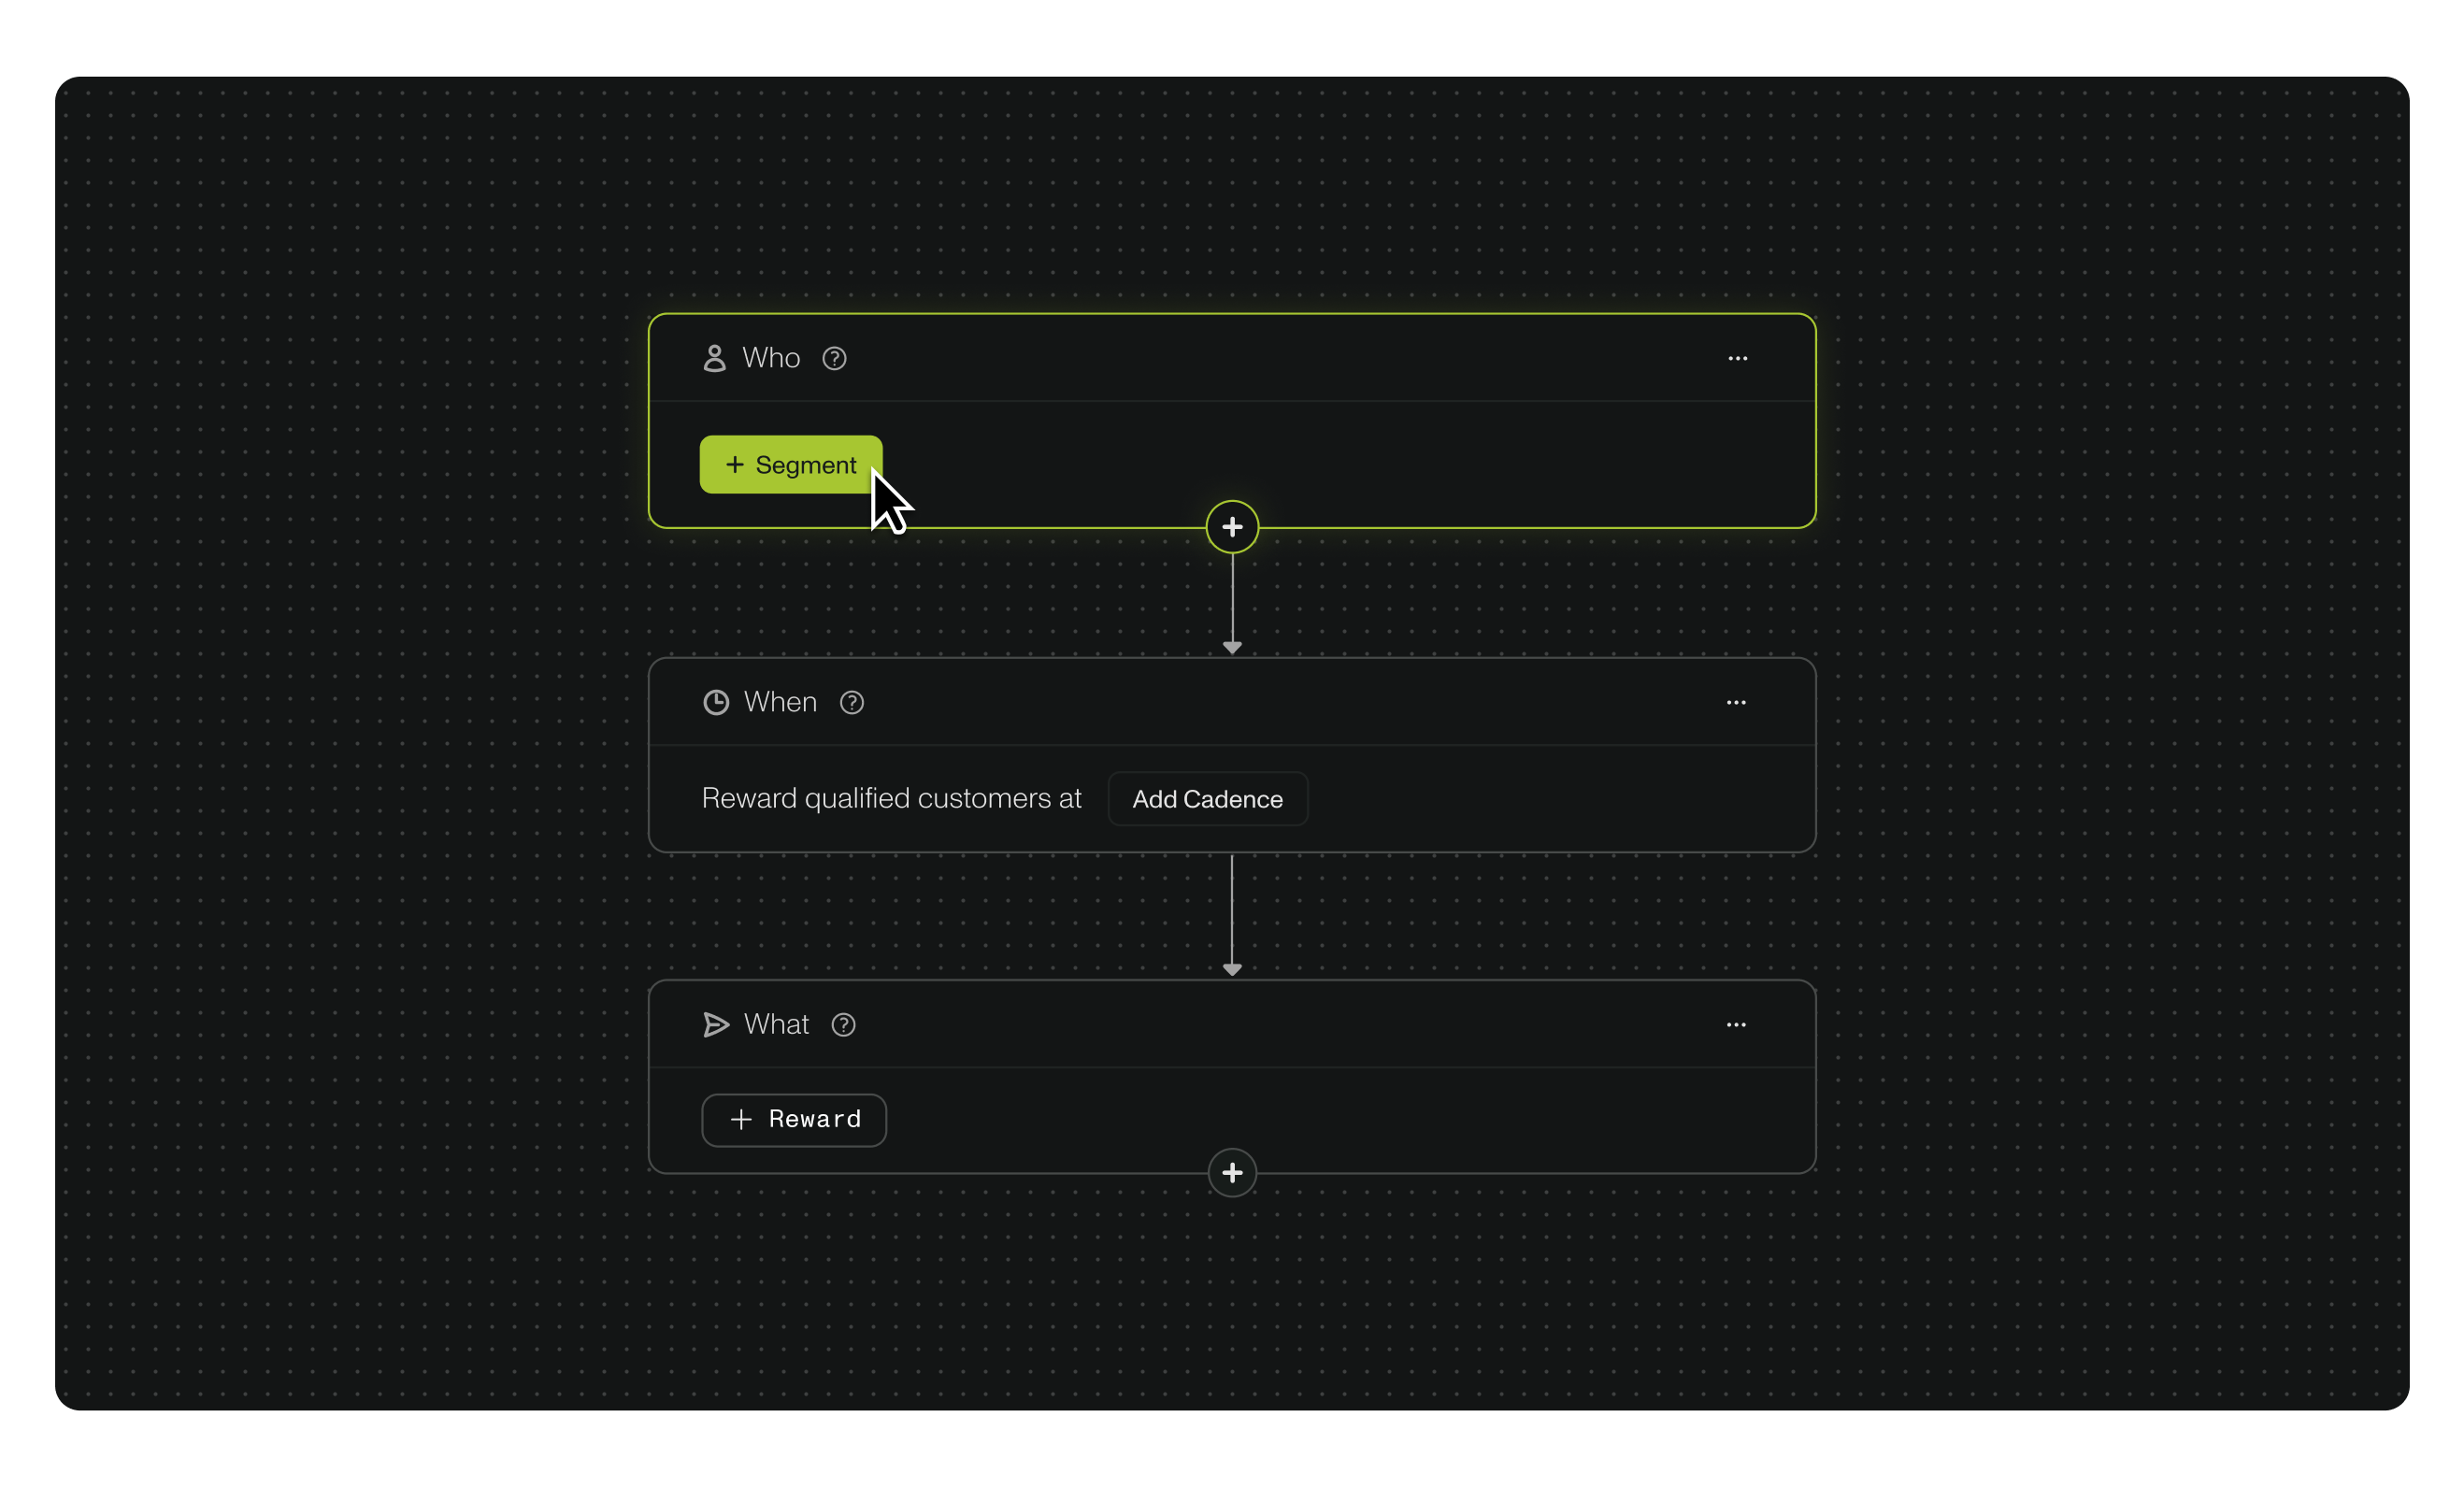
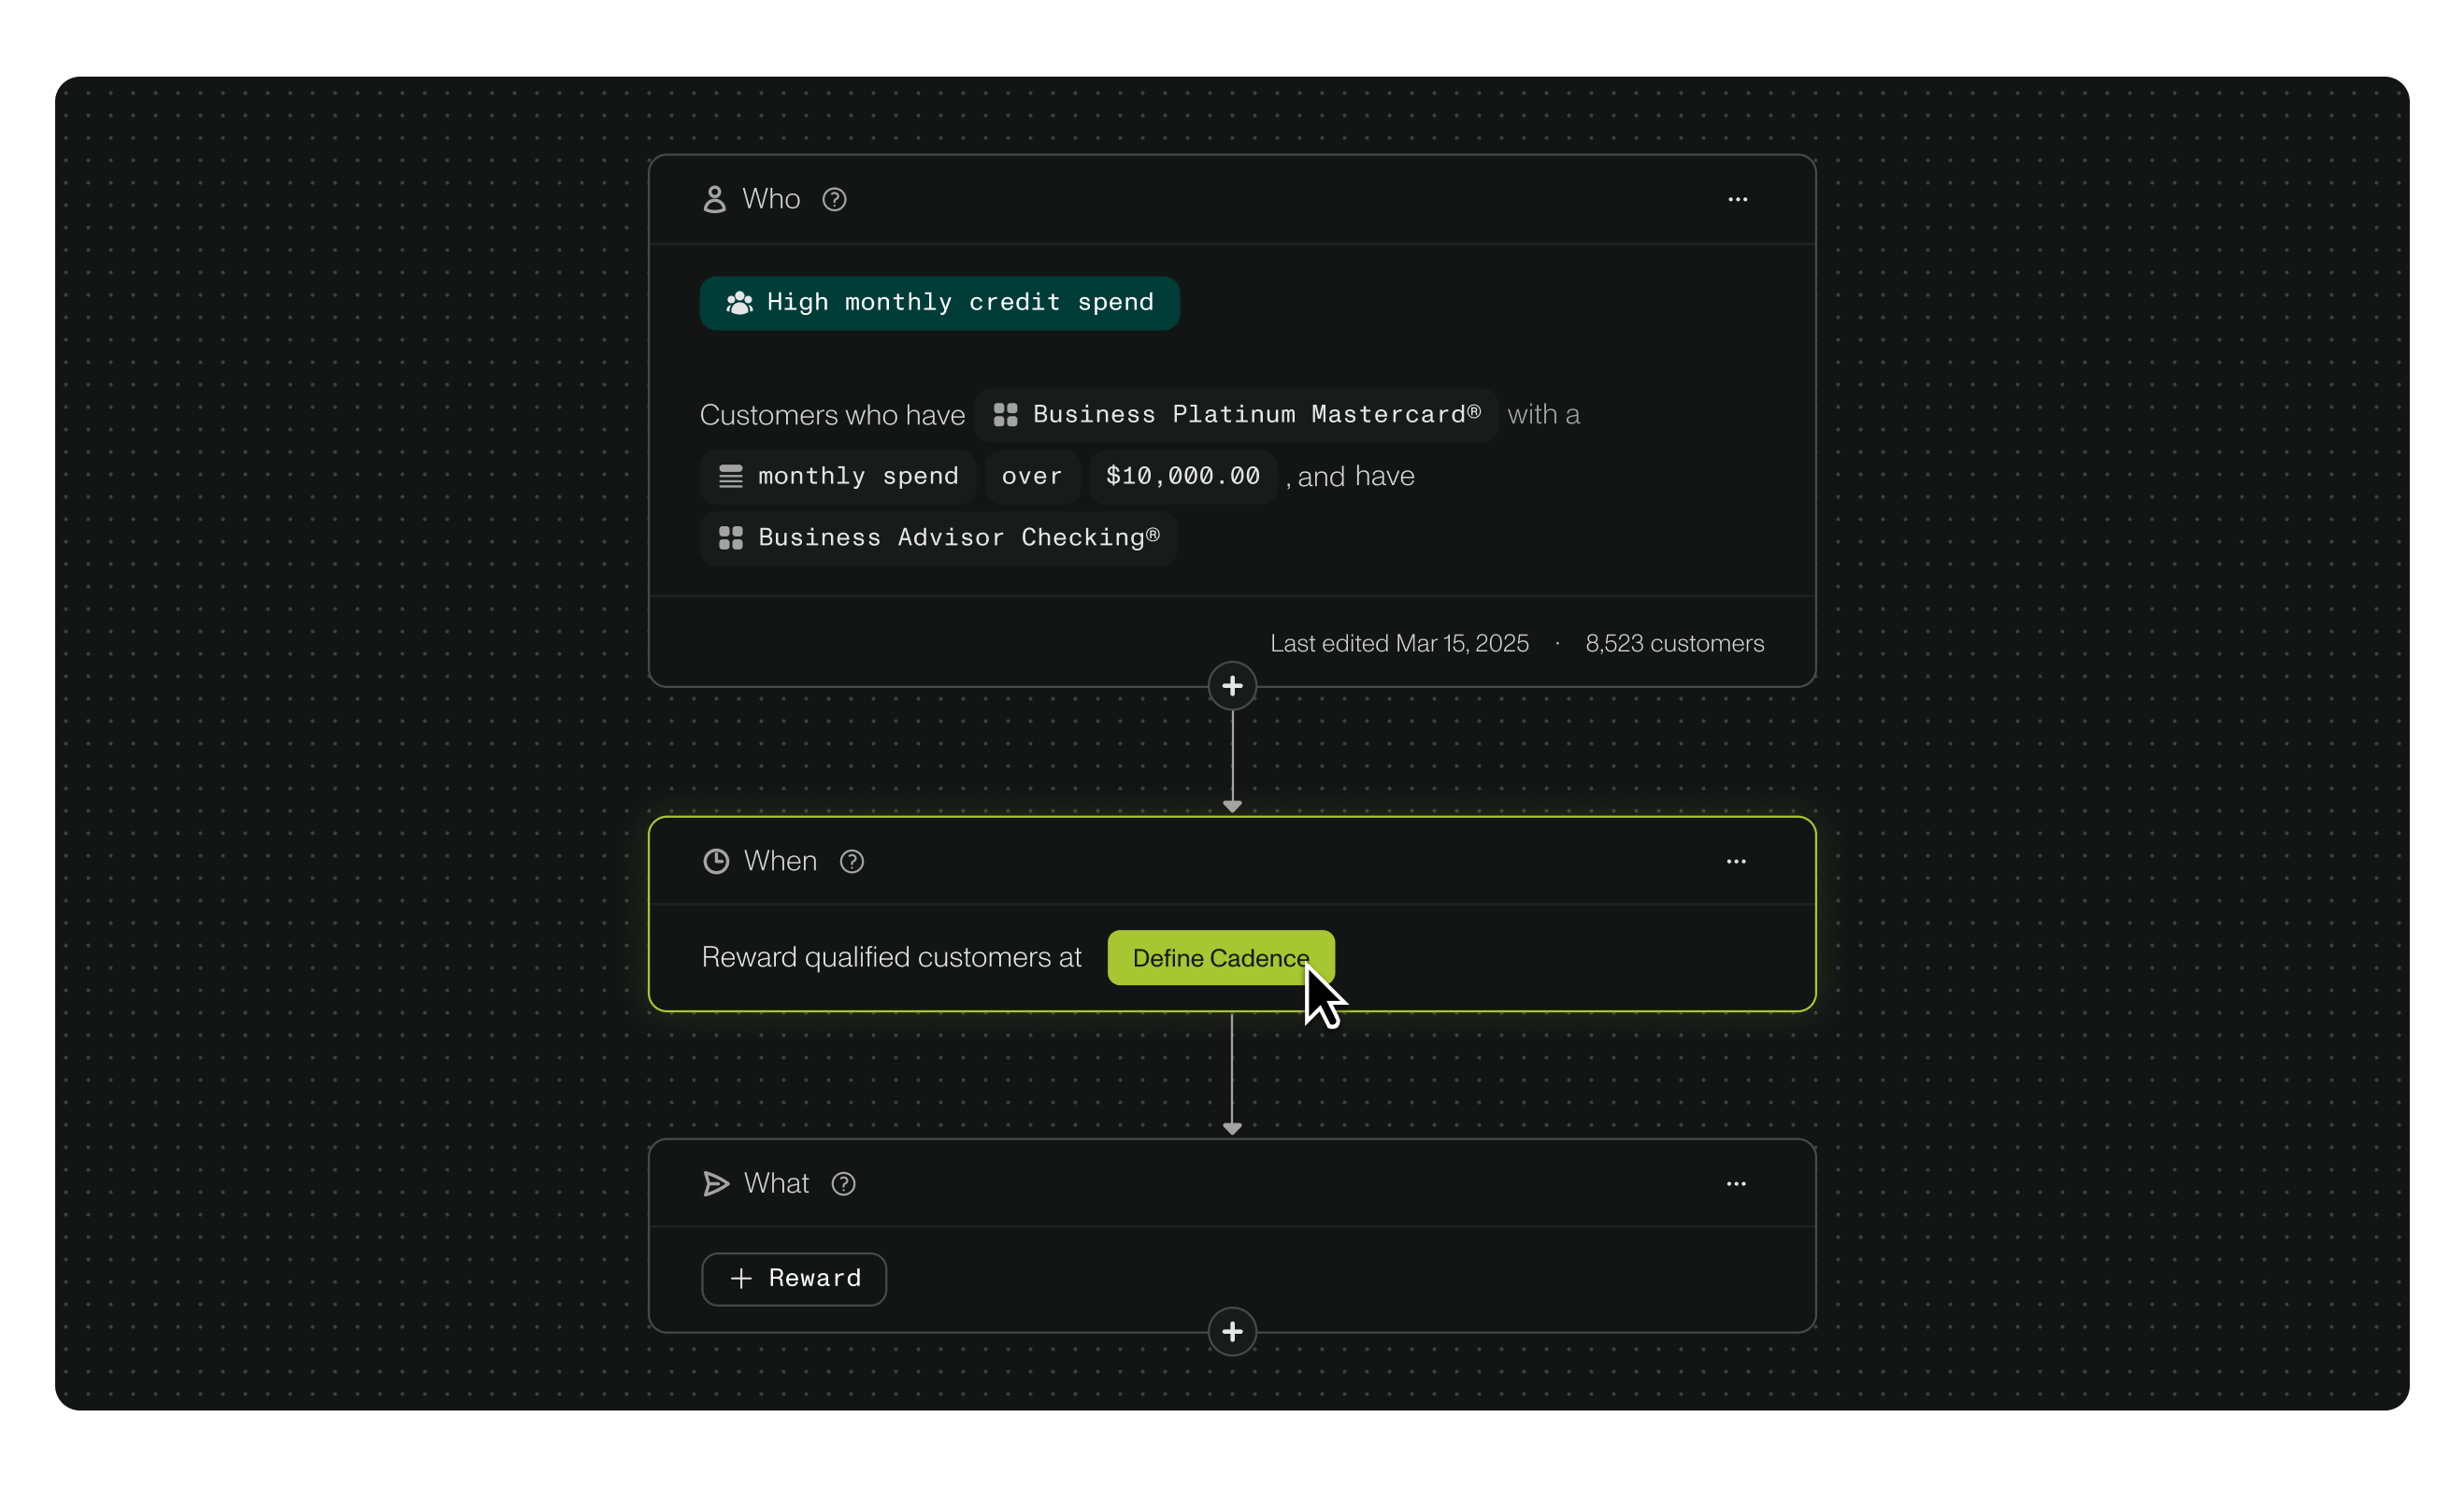
- Determine cadence. Next, you’ll be prompted to schedule a cadence in which the promotion will run under When. For example: a promotion can run at the end of a statement cycle, or on a set date.
- Finally, set the outcome of the promotion in the What section. Whether a cash bonus, a percentage cash back, or a non-monetary reward, you can select the preferred outcome for customers who fulfill the criteria of the promotion that you just created.
- Finally, create your promotion by clicking the green button on the top righthand corner. Additionally, you can save this promotion as a draft to revise later, or discard the promotion altogether by selecting the Save as Draft or Discard button(s).
Additional considerations:
- Multiple Segments can be added to a promotion, as well as multiple outcomes. Simply click on the plus sign under the respective box in the promotion builder under Who or What, or select Add Step to add an additional segment or reward.
Managing Promotions
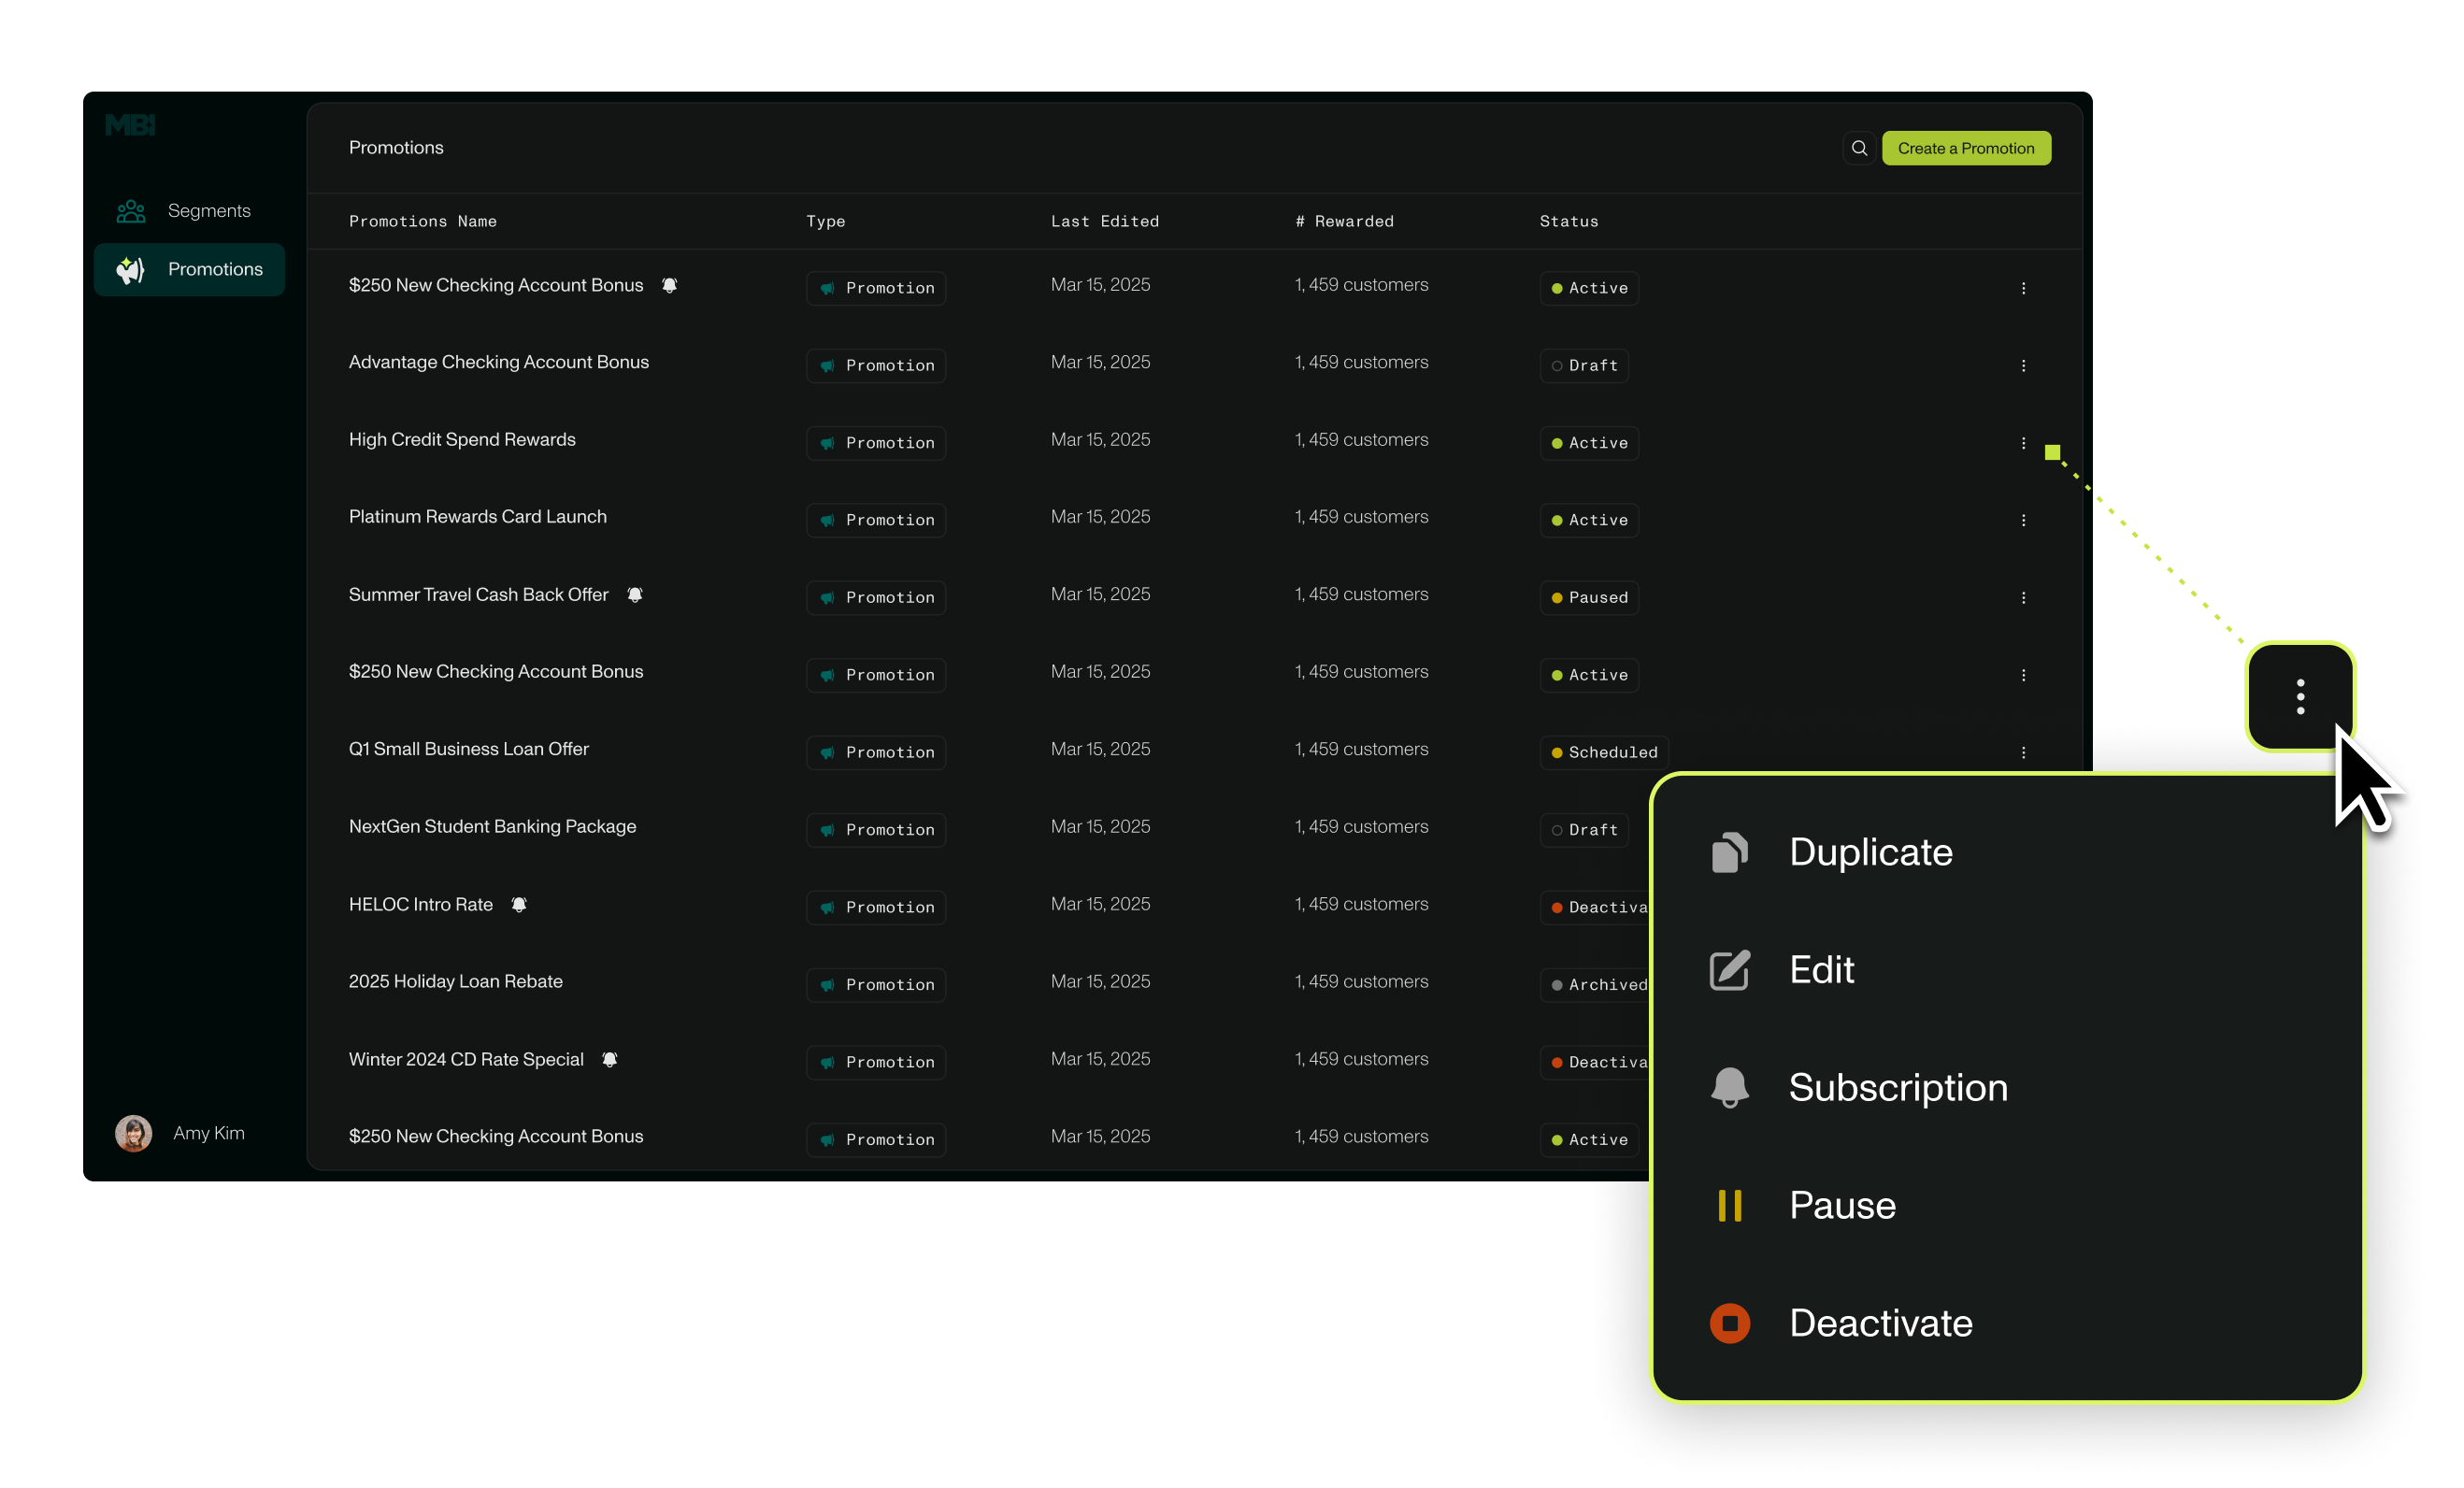
A user can view, edit, deactivate, and manage promotions within a centralized hub on the Promotions page in the MBI platform. Simply click on the three ellipses in the the table to view additional actions.
Promotion Statuses
- Active: Describes a promotion that is currently running or is scheduled to run.
- Paused: A promotion that has been configured and/or previously has run, but is temporarily turned off.
- Deactivated: A promotion that is no longer running, and will not be re-activated again. The past activity from this promotion, however, can still be viewed.